Upload Image
Drag & drop an image
or click to upload
User Guide
Step 1 — Upload and read the Original panel
- Drop a JPG or PNG in. Those are the only two formats with a standard place to store DPI — WebP and GIF have no equivalent field.
- The Original panel then tells you four things: pixel size, the DPI the file declares, its file size, and the size it would print at.
- If it says “DPI not set”, nothing is wrong. Screenshots and browser-exported images usually carry no DPI field, so the tool assumes 96 — the density browsers use as a reference.
Step 2 — Choose the mode that matches your goal
- Set DPI only — keeps every pixel and changes the print size. The file size stays the same. Use this when a form, printer or design brief names a DPI value.
- Resample to target DPI — keeps the print size and changes the pixel count. This is the only mode that makes the file smaller.
- Unsure? If the requirement mentions only a DPI number, use the first. If it also gives dimensions in inches or centimetres, use the second so both agree.
Step 3 — Set the target DPI
- Tap a preset or type any value from 1 to 2400. 300 for commercial print, 200 for scanned documents and most government portals, 150 for drafts, 96 or 72 for screen use.
- If a specification names a number, use that number rather than a rule of thumb.
- Setting a target higher than the original in Resample mode shows a warning — the extra pixels are interpolated, so the file grows without gaining detail.
Step 4 — Check the Result panel before you download
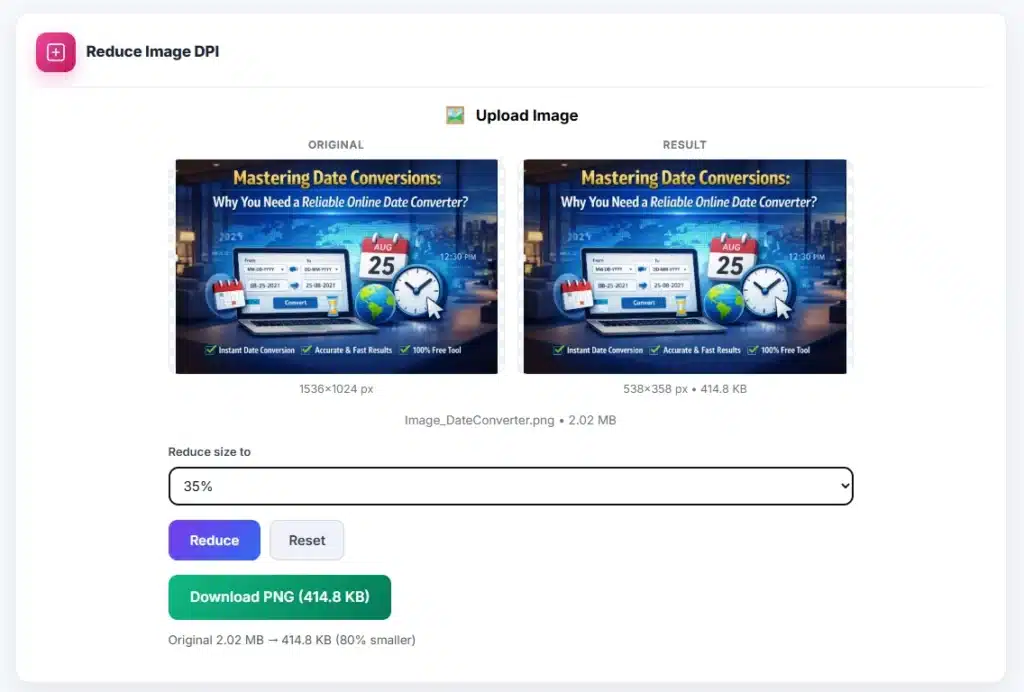
- The Result preview rebuilds as you change anything, and the figures beneath it are measured from the actual output file, not estimated.
- Compare the two panels directly: in Set DPI only the images are identical and only the print size differs — which is the clearest demonstration of what DPI actually controls.
- In Resample, watch the pixel size and file size fall together. Halving the DPI removes roughly three-quarters of the pixels.
Step 5 — Download and verify
- Download saves the file with the new DPI written into it — the JFIF density fields for a JPG, the pHYs chunk for a PNG.
- The filename carries the value, for example
scan-200dpi.jpg, so you can tell versions apart later. - To confirm it took: reopen the saved file in this tool. The Original panel should now report your new DPI.
If a portal still rejects the file
- “File too large” — you probably used Set DPI only. Switch to Resample, which is what reduces size.
- “Resolution too low” — your source genuinely lacks pixels. Upsampling will not fix it; you need a higher-resolution original.
- Dimensions also specified — resize to the required pixel size first with the Image Resizer, then set the DPI here.
About the Reduce Image DPI Tool
This tool reads the DPI value stored inside a JPG or PNG, lets you set a new one, and writes it back into the file. That sounds simple, and the operation is — but DPI is the most misunderstood number in digital imaging, and most people arrive here wanting one of two completely different outcomes. Getting the wrong one is why files come back rejected. This page explains the difference, and the tool asks you to choose between them explicitly rather than guessing.
What DPI actually is
DPI (dots per inch), or more accurately PPI (pixels per inch) for screen images, is metadata. It is a number written into the file header that says: when this image is printed, pack this many pixels into each inch of paper.
It does not describe the image. It describes an intention about printing it. A 1200 × 1800 photograph is 1200 × 1800 pixels whether the header says 72 DPI or 300 DPI — identical pixels, identical file size, identical appearance on any screen. The only thing that changes is how large it comes out of a printer.
| Same 1200 × 1800 image | Print size | File size |
|---|---|---|
| at 72 DPI | 16.7 × 25.0 in | unchanged |
| at 150 DPI | 8.0 × 12.0 in | unchanged |
| at 300 DPI | 4.0 × 6.0 in | unchanged |
The arithmetic is simply print size = pixels ÷ DPI. Higher DPI means the same pixels are squeezed into a smaller area, so the print is smaller and sharper.
The misconception that brings most people here
Reducing DPI does not reduce file size. This is the single most common misunderstanding about the setting, and it is worth being blunt about because acting on it wastes a lot of time. Changing the header from 300 to 72 alters a handful of bytes and nothing else — the pixel data is untouched, so a 4 MB file stays a 4 MB file.
What actually reduces file size is having fewer pixels. That is a different operation, called resampling, and this tool offers it as a separate mode precisely because conflating the two is where things go wrong.
The two modes, and which one you need
| Set DPI only | Resample to target DPI | |
|---|---|---|
| Pixel dimensions | Unchanged | Changed |
| Print size | Changes | Unchanged |
| File size | Unchanged | Changes, often dramatically |
| Image quality | Identical | Softer if reduced |
| Use it when | A form or printer demands a specific DPI | You need a smaller file, or a specific size at a specific DPI |
Set DPI only is what you want when a submission portal, a print shop or a design brief specifies a DPI value. The requirement is about the metadata, and every pixel of your image is preserved.
Resample keeps the physical print size fixed and changes the pixel count to match your target. Dropping a 300 DPI image to 150 DPI halves the width and height, which removes three-quarters of the pixels — and file size follows roughly in proportion. This is the mode that genuinely shrinks a file.
What DPI value do you actually need?
| DPI | Typical use | Notes |
|---|---|---|
| 72 | Legacy web standard | Historical Mac screen density; still requested by older briefs |
| 96 | Windows and CSS reference | The value browsers assume when none is set |
| 150 | Draft printing, internal documents | Acceptable for text, visibly soft for photographs |
| 200 | Scanned documents, many portals | Comfortable for body text; common government requirement |
| 300 | Commercial print standard | The default for anything professionally printed |
| 600 | Line art, fine detail, archival scans | Rarely needed for photographs |
If a form specifies a DPI without saying why, it almost always wants the metadata to read that number — use Set DPI only. If it specifies both a DPI and physical dimensions, use Resample so the two agree.
Why your file may say nothing at all
Plenty of images carry no DPI value. Screenshots, images exported by web tools, and anything that has passed through a browser canvas typically arrive with the field absent. When that happens this tool reports not set and assumes 96, which is the value browsers and the CSS specification use as the reference pixel density. Setting an explicit DPI on such a file is often exactly what a print workflow needs.
Upsampling does not add detail
Raising DPI in resample mode makes the image larger in pixels, but the extra pixels are interpolated — invented from their neighbours. A 72 DPI image resampled to 300 DPI becomes four times wider and a much larger file, without a scrap of extra detail. It will look softer than the original, not sharper. If a printer asks for 300 DPI and your source is genuinely low resolution, the honest answer is to find a higher-resolution original rather than to inflate the one you have.
Worked example
A scanned certificate arrives as a 2480 × 3508 JPG at 300 DPI, 4.2 MB — that is exactly A4 at 300 DPI (8.27 × 11.69 inches). A portal demands 200 DPI and a maximum of 2 MB. Choosing Resample with a target of 200 produces a 1653 × 2339 image, still exactly A4 but at 200 DPI, and roughly 1.9 MB. Choosing Set DPI only would have written 200 into the header and left the file at 4.2 MB, still over the limit — the same request, two very different outcomes.
How the DPI is written
The value is stored differently in each format, and this tool writes both correctly rather than relying on a re-encode that would silently discard it. In a JPEG it lives in the JFIF APP0 segment as a density unit plus horizontal and vertical density values. In a PNG it lives in the pHYs chunk as pixels per metre, with a CRC checksum that must be recalculated or decoders will ignore the chunk entirely. Both are patched at the byte level, which is why Set DPI only leaves every pixel and the file size untouched.
Privacy
Reading the metadata, resampling and writing the new header all happen inside your browser. Nothing is uploaded, which matters here because the files people set DPI on are usually scanned certificates, identity documents and application photographs. Disconnect from the network after the page loads and the tool still works.
Sources & further reading
- W3C — PNG Specification, pHYs chunk — defines the pixels-per-metre field this tool writes for PNG files.
- JFIF specification (JPEG File Interchange Format) — defines the APP0 density fields used for JPEG.
- Library of Congress — format guidance on resolution for document capture — practical guidance on choosing a scanning resolution.
Frequently Asked Questions
Does reducing DPI make my file smaller?
Not on its own. DPI is metadata — a number in the file header describing intended print size. Changing it alters a few bytes and nothing else, so a 4 MB file stays 4 MB. To actually shrink the file you need fewer pixels, which is what this tool’s Resample mode does.
What is the difference between the two modes?
Set DPI only changes the header and keeps every pixel, so the image prints at a different size but the file size is unchanged. Resample keeps the print size and changes the pixel count instead, which is what genuinely reduces file size. Pick the first when a form specifies a DPI; the second when you need a smaller file.
A form says my image must be 200 DPI. What do I do?
Use Set DPI only with 200 as the target. The requirement is about the value recorded in the file, and this preserves your image exactly. Only use Resample if the form also specifies physical dimensions in inches or centimetres and your image does not already match them.
My image shows ‘not set’ — is something wrong?
No, it is common. Screenshots and images exported through a browser often carry no DPI field at all. The tool assumes 96, the density browsers and CSS use as a reference. Writing an explicit DPI is frequently exactly what a print workflow needs.
Can I increase DPI to make a blurry image sharper?
No. Raising DPI in Resample mode adds pixels by interpolating between existing ones — invented data, not recovered detail. The file gets larger and the image looks softer, never sharper. If a printer needs 300 DPI, you need a higher-resolution original.
Which DPI should I choose?
300 for commercial printing, 200 for scanned documents and most government portals, 150 for draft printing, and 96 or 72 for screen use. If a specification names a number, use that number rather than a rule of thumb.
Does this work with WebP or other formats?
No — JPG and PNG only, because they are the formats with a standard place to store DPI. JPEG uses the JFIF APP0 density fields and PNG uses the pHYs chunk. WebP has no equivalent that printing software reliably reads.
Is my image uploaded to a server?
No. Reading the metadata, resampling and writing the new header all happen in your browser. Nothing is transmitted, which matters here because the files people set DPI on are usually scanned certificates and identity documents.